

When you’re ready to start your next DIY painting project, after choosing the right paintbrush and deciding what colors and sheen of paint to use, the next step is prepping your paint surface. To achieve a professional-quality paint job, Freeland Painting recommends using painter’s tape to ensure sharp, clean paint lines.
Painter’s tape serves as a barrier between the areas you want to paint—and those you don’t. It’s especially useful on ceilings, baseboards, and trim. Here’s what you need to know to apply, use, and remove painters tape like a pro.
- Choose the right painter’s tape for your paint project.
With painter’s tape, you get what you pay for. While you may be tempted to buy a cheap painter’s tape, at Freeland Painting we recommend “sticking with” the original: Blue interior painter’s tape from Scotch. We like ScotchBlue original multi-surface painter’s tape in the 1.5-inch width. With its medium-strength adhesive, it’s our go-to tape for protecting trim, drywall, ceilings, and floors. If you’re painting near delicate surfaces such as cabinets or freshly painted surfaces that you want to protect, use ScotchBlue’s lower-adhesive version. Unsure which tape is best for your project? Scotch offers a handy, free paint tape selector tool to help you decide.
Pro tip: Here’s what not to use: Masking tape looks similar to painters tape, but its adhesive leaves a sticky residue, which can be difficult to remove. And be sure to check that your painter’s tape is for interior surfaces when you’re painting inside. Exterior painter’s tape has stronger adhesive to stick to cement, brick, or stucco and could damage your walls, trim, or other interior surface when used inside.
- Prepare Surfaces Like a Pro
To get the best paint job possible, you have to prepare like a pro. With a clean, damp sponge or cloth, gently wipe the surfaces you plan to tape and paint. This includes baseboards, trim, walls, ceilings, and wherever else may soon have either paint or painter’s tape on it. The reason is simple: Dust builds up (yes, even on walls—don’t ask us how!) and can prevent both paint and painter’s tape from adhering correctly. If you skip wiping down dusty baseboard surfaces and apply painter’s tape on top of the dust, the tape won’t adhere properly and may leak or pucker. When that happens, paint spreads under the tape resulting in messy lines—defeating the purpose of taping in the first place!
Pro tip: While waiting for your surfaces to dry after wiping them down, remove light switch covers, nails, and other fixtures. A 3-inch piece of painter’s tape applied over the bare light switch itself will prevent unwanted paint splatter. Use another small piece of painter’s tape to stick the light switch cover screws onto the back of the cover itself, so they don’t get lost.
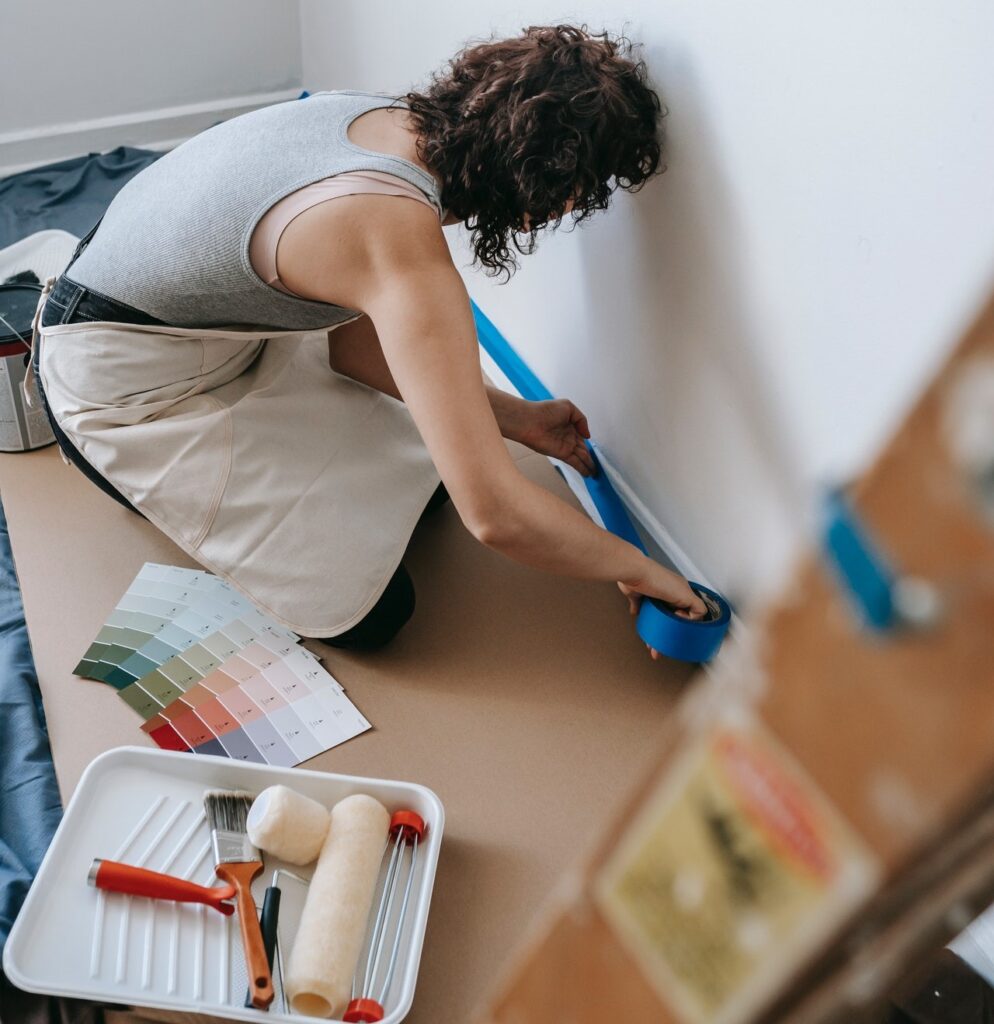
- Apply Painter’s Tape With Precision
Once your surface is clean and dry, it’s time to start taping. When applying tape to a straight edge such as a ceiling or baseboard trim, keep the roll of tape flat against the wall and work in short sections (about 8 inches at a time), aligning the tape over the surface you’re taping and making sure it sticks well. Avoid stretching the tape. Rookie paint tapers may want to remove short, 6- to 10-inch sections of tape while you get the hang of it. Once the tape is applied, go back over its edge to seal the bond with a putty knife or credit card. Check out this video from Ace Hardware that shows best practices for using painter’s tape.
Pro tip: When you get to the corner of the baseboard, continue past the corner and run the tape an inch or two up the wall in a perpendicular fashion. Then, use a sharp putty knife or razor blade to cut the tape off the wall along the baseboard line. That way, the corner of your baseboard is thoroughly protected.
- Gently Remove Painter’s Tape
Once you’ve finished painting the wall, it’s time to remove your painters tape. The best time to remove it is just after you’ve painted, while the paint is still wet. Don’t wait for it to dry, as the dry paint may lead to chipping of the paint surface as you remove the tape, resulting in a messy line. To remove painter’s tape, tug gently on the tape at a 45-degree angle. Go slow as you remove it, watching for any trouble spots. If you see or hear paint pulling away from your freshly painted surface, use a razor blade or utility knife to gently cut the tape away from the surface to maintain a clean line.
Pro tip: Though it’s tempting to use the same tape for multiple coats of paint, the expert painters at Freeland Painting know that you’ll get a better result from removing the tape—and reapplying it—with each coat of paint.
Using painter’s tape like a pro takes patience and skill, but the resulting quality paint job is worth the effort.
When you’re ready to call in the professionals, Freeland Painting is here to help. Give us a call to schedule a free estimate on your paint job. Whether it’s a residential, multi-family, or commercial paint project: No job is too big or too small: We do it all!
Call Freeland Painting at 678.679.3126 to schedule your free estimate!